From Cake Lab

Thursday, December 15, 2011

Whimsical Stack of Chrsitmas Presents Cake

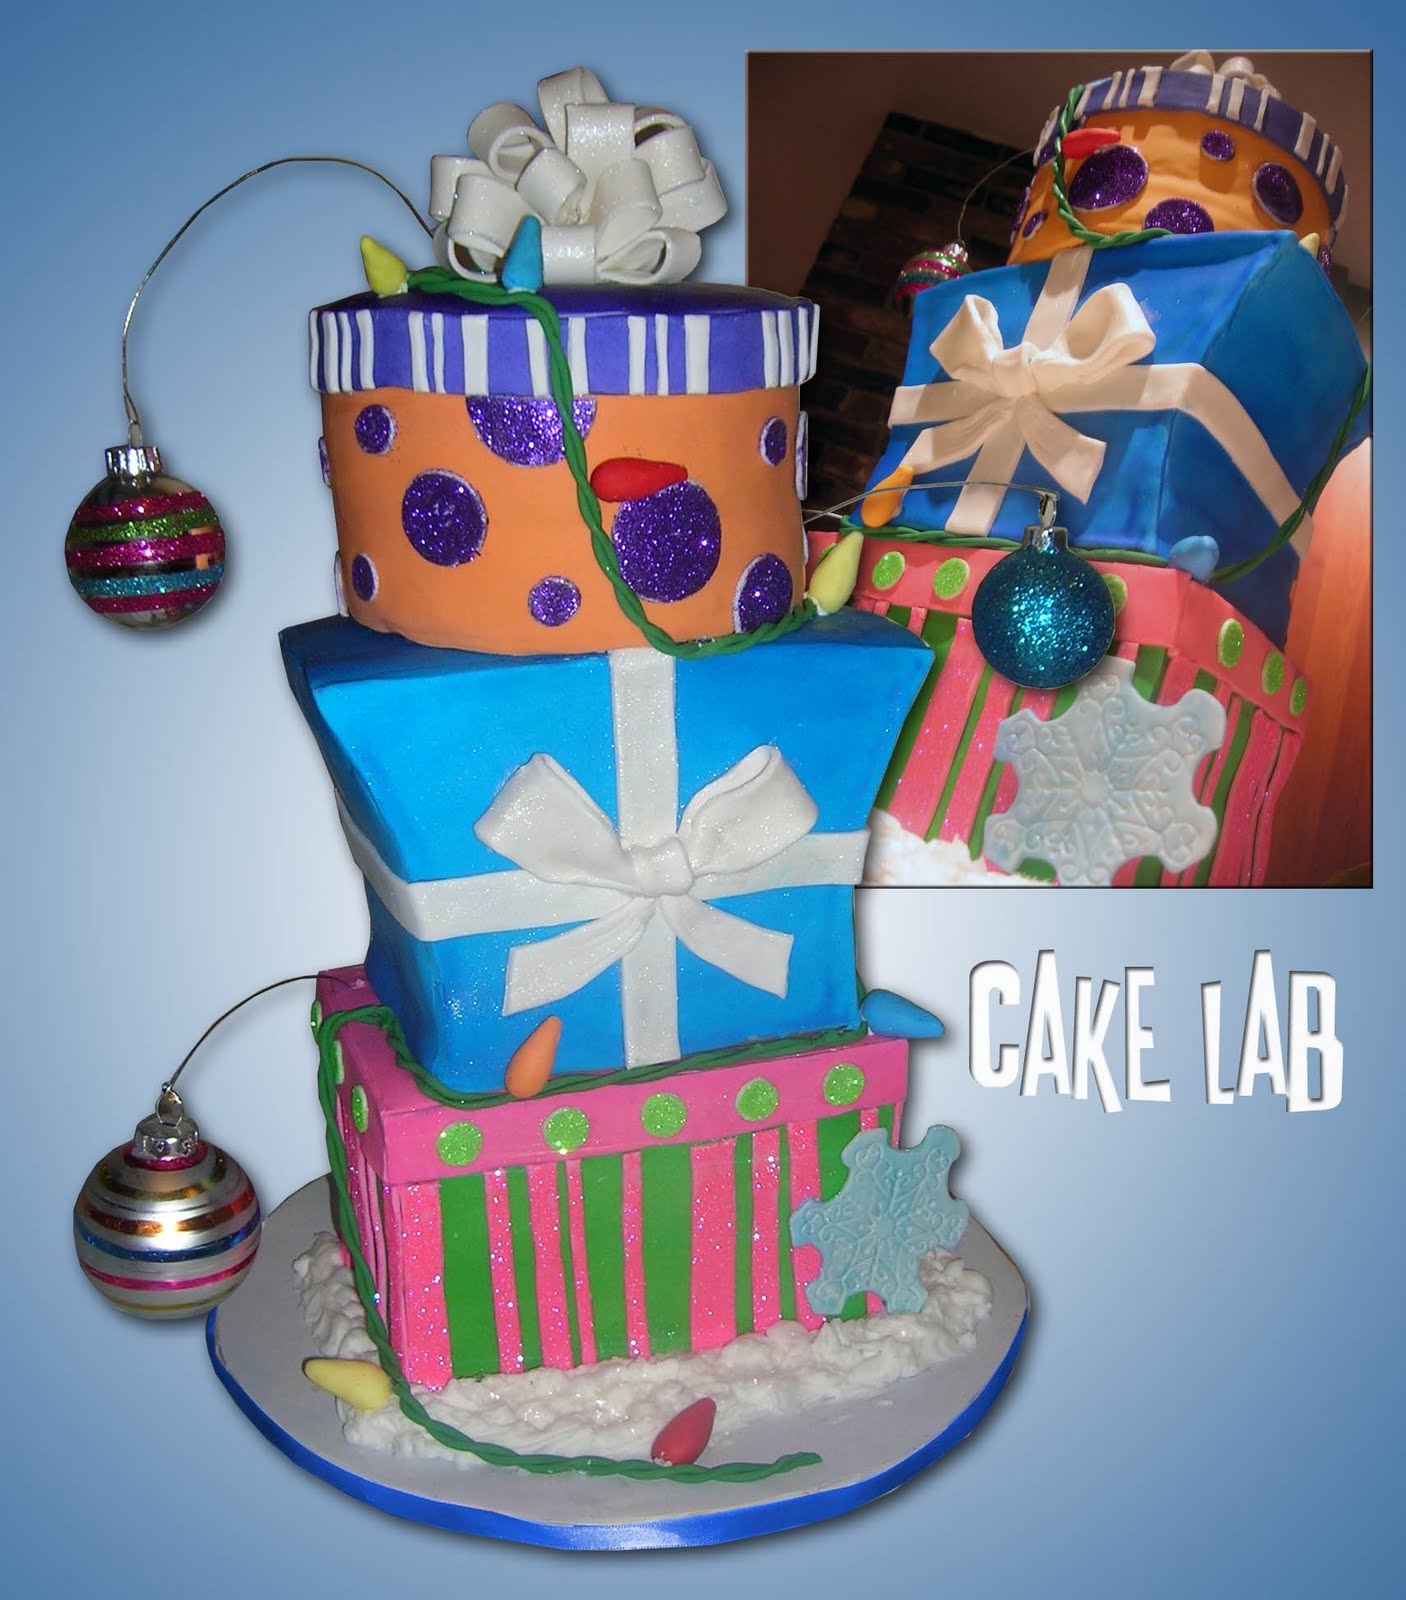
Two years ago my cake hobby was still really new. That Christmas I decided to make a real elaborate cake scene consisting of five presents (one for each member of my family). It was a pretty huge disaster. I tried carving for the first time and everything fell apart (NEVER carve a warm cake), so I ended up starting over and making a simple snowflake cake.
Two years later and I have come a long way...which I should hope so, otherwise this path would seem pretty pointless. Not only are these presents bigger, but they are stacked and one is shaped. I'm also now a big fan of paneling the fondant for squared cakes. The angles are so much sharper than when you drape fondant.


All the details on the cake are edible, although I did decide to include real ornaments basically just to save time. it would have been cool to make them out of cake balls, but after a while I run out of steam. In terms of the overall look of the cake, I'm not really that satisfied. I had a really hard time coming up with a design for the top tier. Originally it was white and sprayed silver, but I wasn't really liking that so I airbrushed it red and applied white snowflakes. It was nice, but a little too traditional so I tore off the fondant and started over. I think I probably would have been better off keeping in the pink/green theme. Either way the cake was a hit with my co-workers. A fun, colorful cake for some fun people!

Sunday, December 11, 2011

Dr. Seuss's Cat in the Hat Cake

Last February I made a Cat in the Hat cake for fun that was based off another shop's design. The resulting cake felt bland and uninspired. This week I was pretty excited to have the chance to right my wrong. The client sent me some photos of two cake designs to choose from. After learning from my mistake I told them I would rather not try to mimic their preselected designs, so they said as long as it was topsy turvy and Cat in the Hat themed I had free reign.
After baking the cake (which required LOTTTS of strawberries), the first thing I sculpted was the fish. Originally I had found a small glass candle holder that the fish was supposed to "fall" out of, and I brushed it with blue piping gel for water. It looked cool but I put it aside till the end.
All details on the cake are edible. Rice cereal treats for the hat and box and icing images for the characters. In terms of difficultly, nothing gave me TOO much trouble. The worst part was the structure of the cake. This is definitely the most extreme topsy turvy carving I've done. In fact if you looked at the side/back it would look almost like it really would tip over...which I guess is the point, but I liked the angles I picked for the front of the cake better.


When I reached the end of placing the details on the cake, I almost forgot about the first thing I made! In my original sketch the fish was supposed to be on the top of the cake, but there was no room for him with the hat and the candles. I placed him on the bottom right but that interfered with the flow of the cake. The only option I could think of was to cut him up and stick him on the cake. I added some fondant wave accents and I'm actually really happy with the way he ended up.
So far I have yet to have a caketastrophe, but this one definitely made me nervous. The only reason I had this order in the first place was because the original baker's cake collapsed in the fridge and I was a last minute backup. Every time I left the cake I held my breath upon returning, hoping it would still be in one piece. Extra thick cake board, generous amounts of royal icing, and sturdy dowels helped keep the cake in one piece.
In the end I think it might just be my favorite cake so far. Actually kinda sad to see it go haha. I guess I have a love/hate relationship with my cakes. My least favorite part is always the beginning...baking, carving, icing, covering in fondant. I really don't start to relax until the cake is on the board and details are being added, but by that point I am pretty tired from the 5-6 hours I already put into the cake. I'm hoping one day I will have someone to help me with the grunt work!

Thursday, December 1, 2011

Blue Nissan VERSA Car Cake


It's been a while since I've made a cake purely for fun, but I had a little more free time than normal this week, and had a craving to get lost in a cake.
At first I was thinking of making a new shoe cake, as the Converse Sneaker Cake was my first ever sculpted cake. Back then it helped me decide to do my own thing, instead of relying on someone else to teach me the trade. I remember spending hours adding details to that mound of cake and being fascinated as the cake slowly began to look like a real shoe. Pure excitement.
But this time I decided to make a cake more symbolic of my next step. I'm heading to San Diego in about six weeks with nothing but my new car and cake supplies. I figured, why not make my car?! It would also allow me to try out a few different decorating methods from my first two cars (Maserati and Batmobile).
On the first two cakes I covered the entire thing in black fondant and then an additional layer, and cut out the windows. This time I decided to cover it in white, airbrush it, then cut out and replace the windows with black fondant. In the future...I will definitely go back to my original method. I also took advantage of my new edible printer to save some time on the details. Unfortunately with all the printed details...the cake started to look like crap. I decided that the front lights and detailing had to be done in fondant, but used the edible images for the tires, license plates, and rear lights.
I wasn't sure if I would be able to get the LED lights in this cake because it was significantly smaller than the maserati cake. Fortunately they JUST fit. Everything else is edible. Grass is buttercream, "pavement" is crushed rice cereal mixed with granulated and brown sugar.


My biggest beef with this cake is the shape of the front. It is so off! Unfortunately the sketch I created at the beginning (check out pics on my Facebook page) was not accurate, and sadly, I did not realize until I was really far along. Oh well, next time I will be more careful with my sketch.
I added the laminated paper map in the background because I thought it would be fun to highlight my upcoming route. I am very excited for the next step, and nervous of course. I will surely miss making cakes in my kitchen, but I've come a long way from making cakes out of my tiny apartment in Montreal. I know whatever is coming next is going to be that much better.

Tuesday, November 29, 2011

Marvel Comics Birthday Cake


This cake is another example of how important it is to invest in sweet decorating tools. First off the airbrush, something I've been using for over a year now. It allowed me to cover both tiers in white fondant, saving either time (kneading color into it SUX) or money (you can't get that deep red unless it's store bought). It allowed me to give the blue a little bit of texture for the sky, the only downside is that color flies everywhere!
My newest tool is my printer that produces edible images. I wasn't 100% sure how these guys would turn out but they crisp and vibrant. I cut the images out of the paper and attached them to gum paste with some piping gel. Then I glued candy sticks to them with some melted chocolate. Easy enough to use but you definitely have to handle those images before they dry out and become prone to damage.
Characters such as these would easily take 2-3 hours at least to sculpt out of edible materials. Sure it would be fun, but that equates to 10-15 hours on JUST figures, forget about the baking, icing, carving, and all the other decorating details that take hours. Obviously it is not really feasible or cost effective, so the edible printer is a great alternative and I am very happy for the purchase. So many ideas on how to use it next!

Monday, November 28, 2011

Peacock Themed Birthday Cake

Time for my mom's birthday cake! She's the lucky one in the family who always happens to be around me for her special day, and that means she get a special cake every year.
This year I decided to go with a peacock theme because we live on peacock hill rd, we used to have pet peacocks in Thailand, and whenever we were in a zoo my mom was guaranteed to imitate the peacock mating calls. Plus it would make for a beautifully colorful cake.
Normally I'm all for keeping the cake as edible as possible, but after my initial design I decided I wanted to include a real peacock feather in the cake (well real silk...real bird would be icky). I actually was not able to find a single peacock feather for sale, just some type of floral arrangement that had a couple feathers in it. I decided to buy it and cut off the feather I needed.
As the cake was being made, I wondered how it would look if I just stuck the whole arrangement in the top. I tried it and it actually looked pretty nice, but a little too big for this cake. I decided to cut off the feathers and place them in different locations...worked out perfectly!


My mom's 49th birthday cake was my third real decorated cake. Not exactly something to rave about...but it's awesome looking back to see the progress I made between '09-'10, and then '10-'11. I know I've come a long ways and I have no plans to remain stagnant. I can't wait to see the types of cakes I'll be creating three, five or even ten years down the line.

Sunday, November 27, 2011

LEGO Soldier Cake


I've made a few vertically daring cakes in the past year, but when I heard about a standing LEGO character I was definitely worried. All of my tall cakes have been pretty equal in terms of width and depth, but the LEGO man is much wider than he is deep. I really wasn't sure if this was something I would be able to pull off.
To increase the cakes survival during delivery, I decided to make the cake deeper than I would if I were to make it to scale. Generally I like to keep the cakes as close to scale as possible, but I feel if I did on this one it would have resulted in a unstable cake. I don't think the increased depth distracts from the look of the cake.
I also kept the head removable so it could be transported in a box separately. Arms were maded of rice cereal treats with fondant and gumpaste accents. Have to say these type of cakes sure do stress me out, but it's pretty cool to pull it off, and no collapsed cake so far! *fingers crossed*

Saturday, October 1, 2011

Circles and Swirls Cake

I took some time off from making cakes because I needed to figure out what I wanted to do with my life. Being young and single I feel like the options are somewhat endless...I just have to figure out what's most important to me and still makes sense.
After spending about a year experimenting with cake techniques in Cake Lab, I wondered if maybe it would be better for me to travel elsewhere and learn from a more experienced decorator. Kill two birds with one stone! Warmer weather and less stress from doing your own thing...but after giving it some more thought, I realized I love making cakes. I love making MY cakes. While I'm sure it would be nice to have a helpful hand guiding me once in a while, I have kinda gotten use to taking responsibility for all the successes and flaws. It's also been reassuring to receive lots of positive feedback after the cake has been delivered and consumed, and I even ran into two customers in the past couple weeks who told me how much they loved the cakes I made for them and told me when their next cake will be needed. Definitely a good sign. I felt like I kinda had to continue doing my own thing, but with a new look. I decided on Cake Haven, but may actually still end up using Cake Lab (more on that later).


I had lots of freedom with the design of this cake. The only specifications were two tier format with colors like green, pink, and red. These colors reminded me of a cake I had recently seen in a book that was topsy turvy with lots of flowers. Then I remembered a circle and swirl design on a pack of Orbit gum I really liked...the ideas kinda just kept flowing around in there. Even once I started I wasn't really sure what it was going to look like (like most of my cakes!), but those are the most fun to make and the client was very pleased.


Luau Mini Cake & Cupcakes


So, I'm kinda terrible at keeping up with my blog. This cake was made over five weeks ago!
The cake/cupcake presentation was for a joint 40th birthday celebration, and was exactly what I needed to get myself out of my creative slump.
I love just about everything on this cake. It's relatively simple but so pretty to look at. The fish, shells, colors and surfboards...love how they all go together. Oh and how can I forget the buttercream waves that adorned the risers. This little project proved to myself that unless I'm making an object out of cake, I really need to let the design come from my head otherwise it just doesn't work as well.


Wednesday, September 14, 2011

Cookie Monster Cake


Cookie Monster was one of my first fun cakes in a while. I wanted to do something cute, fairly impressive, and not too stressful, so he seemed like the perfect choice. Cookie Monster was made out of chocolate cake and covered in blue buttercream with fondant accents. Real chocolate chip cookies were use for the cake, which I enjoyed because I'm not really such a cake person anyway.
I tried a new cookie dough filling for the inside since it seemed a little unique and appropriate for the cake. I gotta admit, it was delicious!

Sunday, August 21, 2011

Blue Waves Wedding Cake


This is only my second wedding cake, and a little more traditional than my first (although far from lace and flowers!). I did not come up with the design, it was based off something I had seen online, and I think that was my biggest mistake in this challenge.
The original cake was beautiful. I loved looking at it. My version is nice enough, but clearly it was not executed as smoothly. I do believe that with more time and practice I would be able to make this cake the way I really want to, as even the version I produced this time around couldn't have been made by myself a year ago.
In the end I think this cake ended up being "perfectly nice", but definitely nothing special. I think that even if I was able to make an exact replica...would I really be pleased? I felt no connection to this cake in the end. Creating the design is probably one of my favorite aspects of cake decorating, but it is also quite time consuming. I think I took the lazy man's way out this time. MY cake should have been topsy turvy, and used those waves as inspiration for my design.


The timing of this cake was quite interesting. Just as I'm deciding if I should continue my bushiness or if I should move to a city and work for someone else...
Will I be satisfied producing a cake designed by someone else? I guess it is a job, and it would be a pretty nice job as far as jobs go. Then again, maybe I would someday be in a position to make calls on the design of the cake. Ahhhh decisions, decisions!

ARAI "Warfare" Dirtbike Helmet


When I first saw the design for this cake I was pretty intimidated for some obvious reasons. I had no idea if I could do it, but all I knew was that it looked really cool. I decided to accept the challenge and test out my painting skills.
I was actually really pleased with the way the tribal design turned out, which was the result of about 7 hours of painting with small brushes and toothpicks. Although I really wish I only had to do the one side...I planned on doing the left side first and having it be the "practice" side, but the left side ended up looking nicer, probably because I was feeling fresher, so it ended up being the presentation side.
While I'm fairly happy with the end result, there is definitely something wrong that keeps this from being a great cake. I think the shape is kinda off (and not just the lumpiness on the top...). I didn't expect this to be a difficult shape to carve, but when I was working with just a 2D image I wasn't really sure how the shape was supposed to be. Kinda heartbreaking...next time I'll need to buy and return a real helmet so I'll have something to compare to.


Tuesday, August 9, 2011

Beach Themed Birthday Cake


A couple of months ago I ran a cake raffle and donated all the proceeds to the Make-a-Wish foundation. The winner decided they wanted a beach themed cake for their birthday, and decided to share it with a friend who whose birthday is on the same day.
I poured melted white chocolate into silicone molds and then airbrushed them to simulate the real things. Umbrella and chair were sculpted out of gumpaste. A little difficult to assemble the chair but fortunately I had enough time to let it dry. The sand was crushed up gram crackers mixed with a few types of sugar.
Starting to become more of a fan of royal icing. I used it for the rope on the fence and it was actually much easier to use than I expected. Definitely something I will be using more of in the future.


Wednesday, July 20, 2011

Pool Table Cake


Another 3D object cake...my favorite. This pool table cake was made of strawberry cake with a cream cheese filling.
This is a cake I had known about for a while but I wasn't sure how I was going to execute it. I think I thought it would be so simple that I wouldn't have to worry about it, so when it came time to get started I realized I had a few things to figure out. I used a layer of rice cereal treats for the border of the table so that I wouldn't have to waste any cake and it would also give me sharper corners.
Thick wooden dowels were used for the legs, which I covered in tubing from some gift wrap to give them some bulk, which were then wrapped in black fondant so they matched the rest of the cake. As with most 3D cakes, there were a few more details I would have loved to have added but there just isn't always the time. Not perfect but cool cake nonetheless.

Tuesday, July 19, 2011

"Sex & the City" Themed Bridal Shower Cake

When I first started Cake Lab last October, one of my first cakes was a "Sex & the City" themed birthday cake. I was happy with the cake back then but I've come a long way since.
This time around, I decided to use edible disco dust for the city. I have to say...that crap is a pain! It's hard to stick on and very expensive, but it does result in a unique look when you walk by it. Nothing else reflects the light quite like it. I think from now on I will stick to using it for smaller objects.


I do like this cake but overall I feel like something isn't quite right, just can't put my finger on it. What I do love is the accessories. First time making gumpaste shoes and it wasn't too tricky. The nail polish looked exactly like I wanted. Applied a little vegetable spray on it to give the bottle a shiny appearance, something I learned from a flickr member. The bag was rice cereal treats covered in modeling chocolate then fondant. It was the easiest accessory to make but I think it looks the most impressive. Funny :/
Jello for the drink and fishing wire for the gumpaste pearls. Overall a fun cake and I look forward to upping the ante next time I am asked to do the theme again.

"Space Needs Color" Cake for Threadcakes Contest


A cake contest that is based off crazy graphic T shirt designs? Count me in!
The competition is put on by Threadless, and if you are interested in seeing all the possible design choices you can click here.
If you decided to check out the link, you will see that the options are pretty much endless. Not easy to choose just one, so I decided to start off with a simple one that caught my eye called "Space Needs Color":


My full Threadcakes entry can be viewed here.
Nothing really complicated in terms of technique. It's nice carving lumpy items like rocket exhaust and volcanoes after doing something as smooth and shapely as a car. Again, airbrush came is super handy. Don't know what I'd do without it!
The rocket and paint tubes were made of rice cereal treats covered in modeling chocolate and fondant. I used some fishing wire to suspend the paint drops. It worked out pretty well but I regret not adding more of them. Guess there's always going to be something on every cake that could be done a little differently.
There are many more deign options I want to convert to cake, but I'm probably going to just have time for one, and it's going to require lots of details. Can't wait!

Volcano Cake


Wow, I'm not sure how I've gotten so far behind on my blogging. It's a good habit for me to keep up on for numerous reasons so let's see how many I can whip out today.
When I was first asked to do a dinosaur themed cake I got really excited. Not like I'm a huge dino fan or anything, but I do really enjoy Jurassic Park and they just look...cool haha.
For this cake I invested in some molds which is something I don't normally do. I do enjoy sculpting figures from scratch, but the molds definitely make things go a LOT faster and leaves me more time to focus on other details. The palm tree mold was an excellent choice, they turned out great, were easy to make, and I'm sure I'll be using it again in the future.


The idea for the bottom tier actually came from another cake I saw online. They used the cricut to cut out dinosaur silhouettes, and I loved the contrast of the black on the light blue. Unfortunately, my silhouettes ended up being my least favorite part of the cake. I see now how I could have made them better, but it was the final push in a really busy week. At least I won't make the same mistake again. Still, a fun colorful cake!

Tuesday, July 5, 2011

Yellow Maserati Car Cake

I've made a decent number of 3D cakes in the past 6 months, but most of them are fairly simple in terms of carving. Not since my batmobile cake have I carved something so complex (that was only my second time carving cake and was on a much smaller scale). I forgot how long the carving process can take! Even though I had previously prepared a scaled and elevated cake board for the cake to sit on, and a stencil to get the proportions correct, it still took me about 2.5 hours to do all the carving. Honestly I'm not sure how the time can fly by so quickly! I just kept on carving it away little by little because I had to factor in for the extra bulk that would be added by the buttercream and double layer of fondant. In the end the shape of the car isn't quite as slender as I wanted, but I'll accept it for now! Next time though...gotta be better.


The wheels were pretty time consuming, made of rice cereal treats covered in fondant with a gumpaste center. If I didn't make them the week before I'm not sure I would've been able to finish the cake on time!!
My favorite part is the LED lights. The client wasn't expecting them but I thought it was such a cool idea and really wanted it to work. Took me a while to find them but so happy I did. They are battery powered and last about 100 hours, so it was no problem to put them in the cake switched on and covered in fondant. I painted the fondant with silver petal dust and it gave such a realistic effect, definitely something I will be using in future cakes when appropriate.

Purple Pink and Black Topsy Turvy Cake


What a busy week it was! Not often do I make three cakes in one week. Fortunately there were elements on all the cakes that were able to be done in advance so it wasn't as crazy as it could have been.
This topsy turvy cake has been planned for a while and I couldn't wait to make it as I really like the color combo. Nothing too complex going on here, and for the most part it went pretty smoothly...until I got to the topper and name. I had prepared the name a week earlier, but at that point it was just the sparkly purple text with no background. I liked the look of it, but when I placed it on the cake it got so lost in the busyness of the background. It needed something to help it stand out, so I put a base layer of white under it. I didn't love that, so painted some pink...but didn't love that so added some black. At the same time trying to figure out how to position the wires the way I wanted. Just kinda funny looking back at how much I stressed over this fairly simple cake in the final hours the night before the cake was due. Now that it's over I'm actually quite happy with it! Haha I guess the stress never ends...

Saturday, June 25, 2011

Chessboard & Pieces Cake

I don't even know where to begin with this cake...
One week later and it's still haunting me! I usually have a couple mood swings while working on a cake, but that's just part of the process. This cake literally almost brought me to tears multiple times (but for the record, no actual tears were shed).
The cake started off smoothly enough. Covering the chessboard was simple enough, but I first came across some trouble with the small chess pieces. I thought it would be a great idea to make them out of chocolate versus gumpaste because it's so much tastier. But that meant there was the extra step of melting the chocolate, pouring it in the molds, placing in the freezer and removing. Sometimes there were air pockets in them so I discarded them. The black chocolate presented another problem. You can't actually but black colored chocolate, so I bought dark chocolate and thought I could easily enough turn it black by adding black gel color to the melted chocolate. Not so fast. That stuff turned into a sticky gunk. I then tried dusting the brown pieces black and airbrushing them, but neither of those methods were effective. Then I learned that you could add a little bit of vegetable oil to the melted chocolate to help keep it a soft mixture and that worked pretty well, but still...more time lost and another couple steps.
After successfully making all the chocolate halves, each half needed to be warmed so the pieces could be molded together and the seam could be erased. Basically just took way more time then I needed.
The night before the cake was due I stopped working at midnight. Unfortunately the thought of chess pieces couldn't leave my mind so after an hour or so of tossing and turning I decided to go back to work till 4 am. This may not seem like a big deal to most, but I never stayed up so late for an exam during my 5 years in college. I was clearly stressed.
Once I got to the big pieces, things were going pretty well and I was feeling pretty confident. As I was covering the black piece, I noticed the white fondant on the other piece was beginning to sag. My heart just sank. The finish was so smooth earlier, and now it just looked like crap. I wanted to redo it but not enough time.
I had a whole scene planned out, with cool a cool 2D gumpaste knight and bishop and a medium sized rook made out of rice cereal treats that would all be scattered around the board to make it look complete. But the only accent I finished was the knight, and without the other pieces it didn't look like it belonged, so I decided to leave it behind as the client was only expecting the chessboard and pieces anyway. The last couple hours I was just a wreck. I realized there was no way I was going to be able to complete all the accents I thought were so cool and I was barely going to finish making the big pieces look acceptable. Even writing this now is making me feel depressed all over again!
Right now I'm working on three cakes for the week. I feel like I have to work extra hard to prove to myself that I can make really cool cakes that I can say I'm proud of. But no matter how great those cakes turn out, it still won't make up for my failure. However, what's done is done and there is nothing I can change, so I just have to move forward with these next cakes and learn from this experience.
Grr...this "fun" job is stressful.

Thursday, June 9, 2011

Buffy TVS Slayer's Scythe Cake

It was my birthday earlier this week which meant I had the chance to make a really cool cake for myself. Normally I enjoy working on just about every cake I make, but it's extra fun when I get to make something based on one of my own interests.
This Slayer's Scythe cake was the perfect selection, as it allowed me to make a big sculpted cake (my favorite type), without needing a ton of cake. I decided to make the handle out of brownies since it was so thin, and I like brownies more than cake anyway!
It was fun making the cake section by section. I tried to give the wrap a leather look by rolling it over plastic wrap. It did give me the exact texture I was looking for, but I had time making it as noticeable as I wanted. And gotta love my new extruder for the rope, such a useful tool and I've used it on just about every cake since I bought it!


The only challenge I had with the cake was figuring out how to get the blade silver and red while using the same piece of fondant. I decided to roll white fondant over the cake and then covered the part I wanted silver in blue masking tape. I then airbrushed the cake red, removed the tape, and dusted it with silver petal dust. Not as difficult as I thought!


Oh and I had to have a little bit of fun in photoshop with this cake :)
Have some really cool cakes coming up in June and this was the perfect way to start the month!

Hebron Academy Graduation Cake


Hebron Academy's middle school graduation was held yesterday evening and I was asked to make a cake for the celebration. It also happened to be the 20th anniversary of the middle school, so they wanted that incorporated into the cake.
Now that it's summertime I have to get used to working in the heat and humidity. Even though I decorated the cake in an AC environment, I had more issues with sagging and cracking fondant than I ever have before. The sagging on the side really annoyed me before I left for delivery, but during transport it became even worse! I guess that even just walking through 80+ degree weather for a minute caused the buttercream to melt and shift. I will definitely have to do some research on how to avoid these issues on the next cake.
Overall I really like the look of this cake. Classic like Hebron, but not too formal by being topsy turvy. Definitely a nice addition to the portfolio, and kinda cool because I graduated from the middle school exactly 10 years ago. Crazy!!


Tuesday, May 31, 2011

Elmo 1st Birthday Cake


Another 1st Birthday cake! And my first time doing a boy's 1st.
The design for the cake is based off a photo I found on Flickr. There are a lot of elements on the cake and it's all the details that make the cake so cool. It was nice to have another cake to base the details off of, just because I didn't have a ton of time available and it can take a while to figure out what looks best.
This was my first time covering a cake board in fondant and I really like the way it looked. The plus to using fondant on the base is that gumpaste letters can be applied with a dab of water, compared to gluing them on with melted white chocolate. But it also means extra care is required to keep the base looking clean. Kind of a pain...


Elmo was made with rice cereal treats and covered in red buttercream with fondant accents. Fortunately a fairly easy character to recreate, especially since there were so many other details. Overall it was a pretty fun cake to make and I look forward to finding out what my next 1st birthday cake will be!

Pink Ladybug 1st Birthday Cake


This pink ladybug cake was ordered from a woman in Georgia who wasn't able to attend her grand daughter's first birthday celebration. She wanted to contribute to the party so decided to order a ladybug cake from me.
Overall a pretty simple vanilla cake, although still learned a couple things on this one too! I tried baking the ladybug portion of the cake in a bowl so I wouldn't have to carve and waste too much cake. It took a little while to bake, but it worked pretty well!
The mini bugs were made with a newly purchased mold. Even though they are simple enough to make by scratch, it was nice to just stick a piece of gumpaste in the mold and pop out a bug. Definitely a time saver, and the mold also has some cavities for butterflies, bees, and dragonflies, which will surely come in handy in the future.


Leaf green buttercream was used for the grass and the head was made with rice cereal treats.
The client was extremely appreciative of the cake and it was great to be able to help out.

Sunday, May 8, 2011

Funky Topsy Turvy Wedding Cake

Not sure if I can really classify this as a wedding cake, but it was for a wedding so I guess it meets the criteria!
When I was first contacted about this cake I was told they wanted a purple and green topsy turvy cake with large "obnoxious" flowers. The party was only for 20-25 guests, so we just did a mini 4" tier for the top. One of the coolest things about the wedding was the fact that none of the guests knew they were going to be attending a wedding. Sounds like a fun couple, and they wanted a cake to show off their individuality.
The most challenging part of the cake was definitely the flowers. Once I figured out how to make the lilies, things went pretty smoothly. I originally planned on having three flowers, but after too many mishaps I ended up just using two, which i think ended up looking pretty cool anyway.


This was my second topsy turvy cake, and it's a little bit embarrassing to look back at my first attempt I made just over a year ago. At least it's nice to be able to see how far I've come in a year. Carving is so much easier now, my fondant job is smoother, and my airbrush opens up all sorts of possibilities. I totally forgot that I had used dowels but no cake board last time! Don't know how I expected them to support anything lol.
Anyway I totally love this cake and these are the types of tiered cakes I want to be known for.

Sunday, April 17, 2011

Scooby Doo Cake


*Sigh*
It is a huge relief to know that this cake made it safely to its destination without self destructing. Not only was this my most challenging cake to date, but the timing wasn't the best as I had a busy work week and my car was giving me troubles and had to be serviced.
Scooby was for a 6 year old boy's birthday, and when his mother first contacted me to do his cake, we were thinking of doing a Scooby Doo themed tiered birthday cake. After she checked out some of my previous 3D cakes, she decided to do a 3D Scooby, and I thank her for taking the risk! Although now that I think about it, it was my idea to do Scooby in a sitting position...I'm not really sure why I decided to up the difficulty factor on myself!
The entire process was just completely nerve wracking. Even as the cake started to take form, I knew I couldn't relax until the cake was placed on the party table. Every time I left the cake, I expected to walk in on a pile of crumbs. I even contemplated baking some extra cakes so I could whip up a tiered cake last minute if I really had to. Every baker seems to have one horrible caketastrophe, and I almost expected this to be mine. Fortunately, not the case!

This Scooby cake is made of twelve 6" round vanilla rainbow cakes - you can see some progress photos posted on Facebook.
Covering Scooby in fondant was no easy task. The piece had to be so big, and covering such a tall cake meant there was a lot of excess that needed to be cut off. I was able to make the front look great, but after contouring the fondant to his limbs, the back was already staring to get really dry. Definitely need more than two hands to get a job like that done in the future.
The feature I had the most difficult time with was the teeth. I must have tried at least 10 versions, in various positions, shapes, and sizes. It was really difficult trying to convert the 2D image into a 3D cake...I just didn't know what to do with those pearly whites! In the end, I spent so much effort trying to get the teeth right, that I didn't even think to try no teeth at all. I guess that's what happens when you spend too much time on a project.

Even with the teeth, Scooby is one of my favorite cakes and I can't wait to make another 3D creation.

Friday, April 15, 2011

Pink/Green 50th Birthday Cake


Last week's cake presented me with a bit of a challenge - a cake for a 50th birthday with nothing really specific except the colors pink, green, and the letter 'J'. Since the majority of my cakes are for children, it wasn't so easy coming up with the design.
I started off the bottom tier with stripes and dots, something that looks good on every cake. But after finishing it, I realized it looked too juvenile, especially with the colors. When I got to work on the top tier, I wondered if my Cricut Cake machine could come in handy. I haven't had a ton of experience working with it, and while it can produce some nice decorations, it's still a lot of work. Not to mention I had only ever cut out gumpaste with the machine, which would quickly dry out after continued uses. This time I found some tips online for cutting with fondant, and the one I found to be most useful is to freeze the fondant after it has been rolled out and pressed into the mat. It worked out better than I expected, and I then wanted the bottom tier to tie into the top. Unfortunately it's hard to remove decorations once they are added without damaging the cake, so I could only switch it up so much.
In the end I would say it wasn't my most cohesive design, but I still think it is pretty nice cake.

Thursday, February 24, 2011

Pokemon Cake


The Pokemon craze has died down, so I was really intrigued when I got a call about doing a Pokemon birthday cake.
The design of the cake is pretty simple, and most of the effort was put into making the figurines. Pikachu, Chimchar, and Chicorita are all made of rice krispie treats covered in modeling chocolate, while Jigglypuff, Piplup, and the purple plant pokemon (not sure on its name!) were made of fondant. It's been a while since I've had the chance to sculpt little figures so I really enjoyed making these. I also learned that a great way to glue pieces of the figures together is to use melted chocolate. The white chocolate was also used for details in the eyes...finding lots of uses for that stuff!

Cat in the Hat Cake


This design is from one of my favorite cake shops, City Cakes. Ever since I saw the cake I had wanted to try it myself, so I took the chance when I had some extra time on my hands.
I rarely like to copy cakes, but I thought this one would be fun. Unfortunately the cake didn't turn out quite as I had hoped and I definitely didn't enjoy making the cake that much since I couldn't feel much of "me" in it.
At least I was able to see how my vanilla cake recipe works as a marble cake...very tasty!

Wednesday, February 9, 2011

"Tangled" Tower Cake

The Tangled tower birthday cake is my tallest cake yet, and provided me with more than a little bit of stress. The column was the cake part, and was nine layers of 6" red velvet cakes. I had never stacked so many small cakes on top of each other so I really didn't know how it would work. Just to experiment after baking, I decided to stack all nine cakes just to see how unstable they were. Well...they would not stand, forget about placing the house on top. With the deadline approaching, I was pretty nervous. I thought I must be insane because the client wasn't expecting a cake quite this elaborate, but I thought this was a great idea. I figured if I really had to, I would bake some new 8" cakes and replace some of the 6" layers with them, but obviously the effect I was looking for would have been totally lost.
Fortunately, after leveling, icing, covering in fondant, and doweling, the cake was pretty sturdy! Once I had that all set I was able to relax a little and enjoy the decorating.
Everything on the cake is edible minus the figures, as they were requested by the client. It took over 2.5 boxes of rice krispies and 25 cups of mini marshmallows. Kinda crazy, but so much more fun to make the entire thing edible.
The thing I love most about this cake is the color from edible food paints and dusts. It just goes to show how essential it is to be well stocked in a variety of colors, because you never know what might come in handy. With my budget I can't afford to have all the colors I want on hand, but I think it's time to expand my collection!